

A simple guide to fermenting vegetables
A recipe for fermented wild garlic and a means of (quite literally) bottling the flavour and feeling of a time and place.

A jar is a powerful thing. Through very simple means, it can allow us to jump back to a moment in time at just the twist of a lid and the pop of a seal. I can never resist filling my lungs with the fragrant first fumes from a jar of hot pepper jelly or apple chutney opened at Christmastime - a sure-fired way to transport yourself back to plants and places from seasons past.
Preserving exists in many guises in my kitchen. Whether it be a slowly simmering pot of jam or a hurried pan of compote - I am always drawn to the power it has to not only prevent waste but timestamp a moment; your shelves becoming an album of sorts as the weeks of the year come and go. Multi-coloured and unassuming, the jars patiently wait for you to decide which month you’d like to jump back to with that first closed-eyed mouthful.
Sugar is magical and so is smoke - both adding their own light brush strokes of character to the business of preserving. In my mind, however, nothing comes close to the joy that can be found in preserving with salt - namely by fermentation. It’s an ancient method that not only connects us to our ancestors, but seems to make the fruit or vegetable at hand taste infinitely more of itself - two elements I adore in any realm of cooking.
Most importantly, I cannot stress how simple it is to achieve something extraordinary. It really is a process that is so very easy.
I always loved teaching cooks how to handle food with fire, whether it be in a roaring wood oven or a glowing grill. Even those who had never struck a match before would become masters of the craft in a short space of time once they understood the simple principles of it all. A successful fire needs three very essential things; heat, fuel and oxygen. If you’ve a face-full of smoke to contend with or a lazy bed of embers it’s likely that the balance of the three isn’t in check. A quick reference and a tinkering with any of those core principles is likely to result in a rekindled blaze in a moment.
Fermenting vegetables works in exactly the same way - once you understand the very simple core principles, it’s very easy to troubleshoot and use the produce and salt you have to hand to create something marvellous. So what exactly is fermentation, when referring to the preservation of vegetables?
Here it is, as I understand it, in basic terms;
The use of salt - normally around 1.5-2% of the vegetable’s weight - and the presence of liquid creates an environment without oxygen where the things that normally spoil or alter our food, namely mould, cannot exist. Consequently in the absence of those things (oxygen and mould), the bacteria that is needed to preserve the vegetable (one of the many species of lactobacillus) can thrive. This is why you’ll often see the fermentation of fruits and vegetables referred to as lacto-fermentation.
How does the preservation happen?
Lactic acid bacteria, essential for fermentation, are present on all raw fruit and vegetables. Once a vegetable is cut, scrunched or grated and salt has been added, the cell walls of the vegetable are ruptured, releasing liquid. As the salted vegetable is added to a clean jar or crock, there has usually been enough liquid produced to cover the vegetable completely (a weight is sometimes used to help this along) - thus removing oxygen and allowing the lactic acid bacteria to thrive. The bacteria begin consuming the natural sugars in the vegetable, producing lactic acid and carbon dioxide as a by-product. Sometimes alcohol and acetic acid (most commonly found in vinegar) are produced, too. Over time, as the acidity of the jar increases as more natural vegetable sugars are consumed, fermentation activity will slow.
How long does it take?
Lacto-fermentation, to a certain degree, is never ‘done’ - it’s all a matter of taste. When kept at an ambient room temperature of around 18c, the ferment will begin producing carbon dioxide after a couple of days. After 8-10 days, the jar will have reached an acidity of roughly 2% (vinegar can have an acidity of anywhere between 4-16%) and fermentation will begin to gradually slow. Temperature affects the rate of fermentation massively and consequently flavour, too. A higher temperature means a more rapid rate of fermentation, but many believe that by slowing the process down you can achieve a more complex and deep flavour. The most useful way to gauge whether your ferment is done - at least to your liking - is to taste it! For a more salty and slightly effervescent result, begin tasting it after a few days until the balance is just right. For something more akin to a pickle as we know it, with a sharper and more acidic flavour, continue fermentation (and regular tastings) for another few days. If you still find it too salty, allow it to ferment for a little longer at room temperature and acidity will continue to gently increase. When you’re happy with the flavour, remove the weight in the jar if you’ve used one, and place in the fridge where fermentation will all but grind to a halt. Enjoy dipping into the jar as you see fit.
Why ferment, rather than pickle?
Pickling with a classical vinegar mixture, usually with the addition of water, sugar, spices and salt, is a glorious way of preserving in it’s own right. Why then, bother with fermentation?
I believe, as each vegetable can have a different species and quantity of naturally occurring bacteria on it, every ferment is an opportunity to capture a completely unique aroma and taste - not only acidic, salted and rich in umami but the subtle character that every vegetable holds, too. It’s a way of unlocking a mesmerising set of I-can’t-quite-place-it flavours.
Without heat, and with the presence of salt, whatever vegetable you have chosen to ferment retains it’s natural crunch - something often lost when using a classic hot pickle brine. The salt slows the action of pectin consuming enzymes, allowing the vegetable to keep its natural texture, even after fermentation has slowed to a sluggish pace.
Finally, fermentation gives you utter freedom. With just one calculation to make (that of 2% salt) you can use whatever variety and quantity of vegetable you have to hand. If, for example, you’re to ferment a haul of wild garlic (as the recipe below will dive into in more detail) it’s unlikely that when deep in woodland or at a river bank you’ll have a set of scales to hand. The process of fermentation, first and foremost, allows you to enjoy the process of harvesting, foraging or shopping for your ingredients wholeheartedly, away from the rigid guidance of a shopping list or scribbled quantities. Below is a ferment that I look forward to making, and eating, every single year.
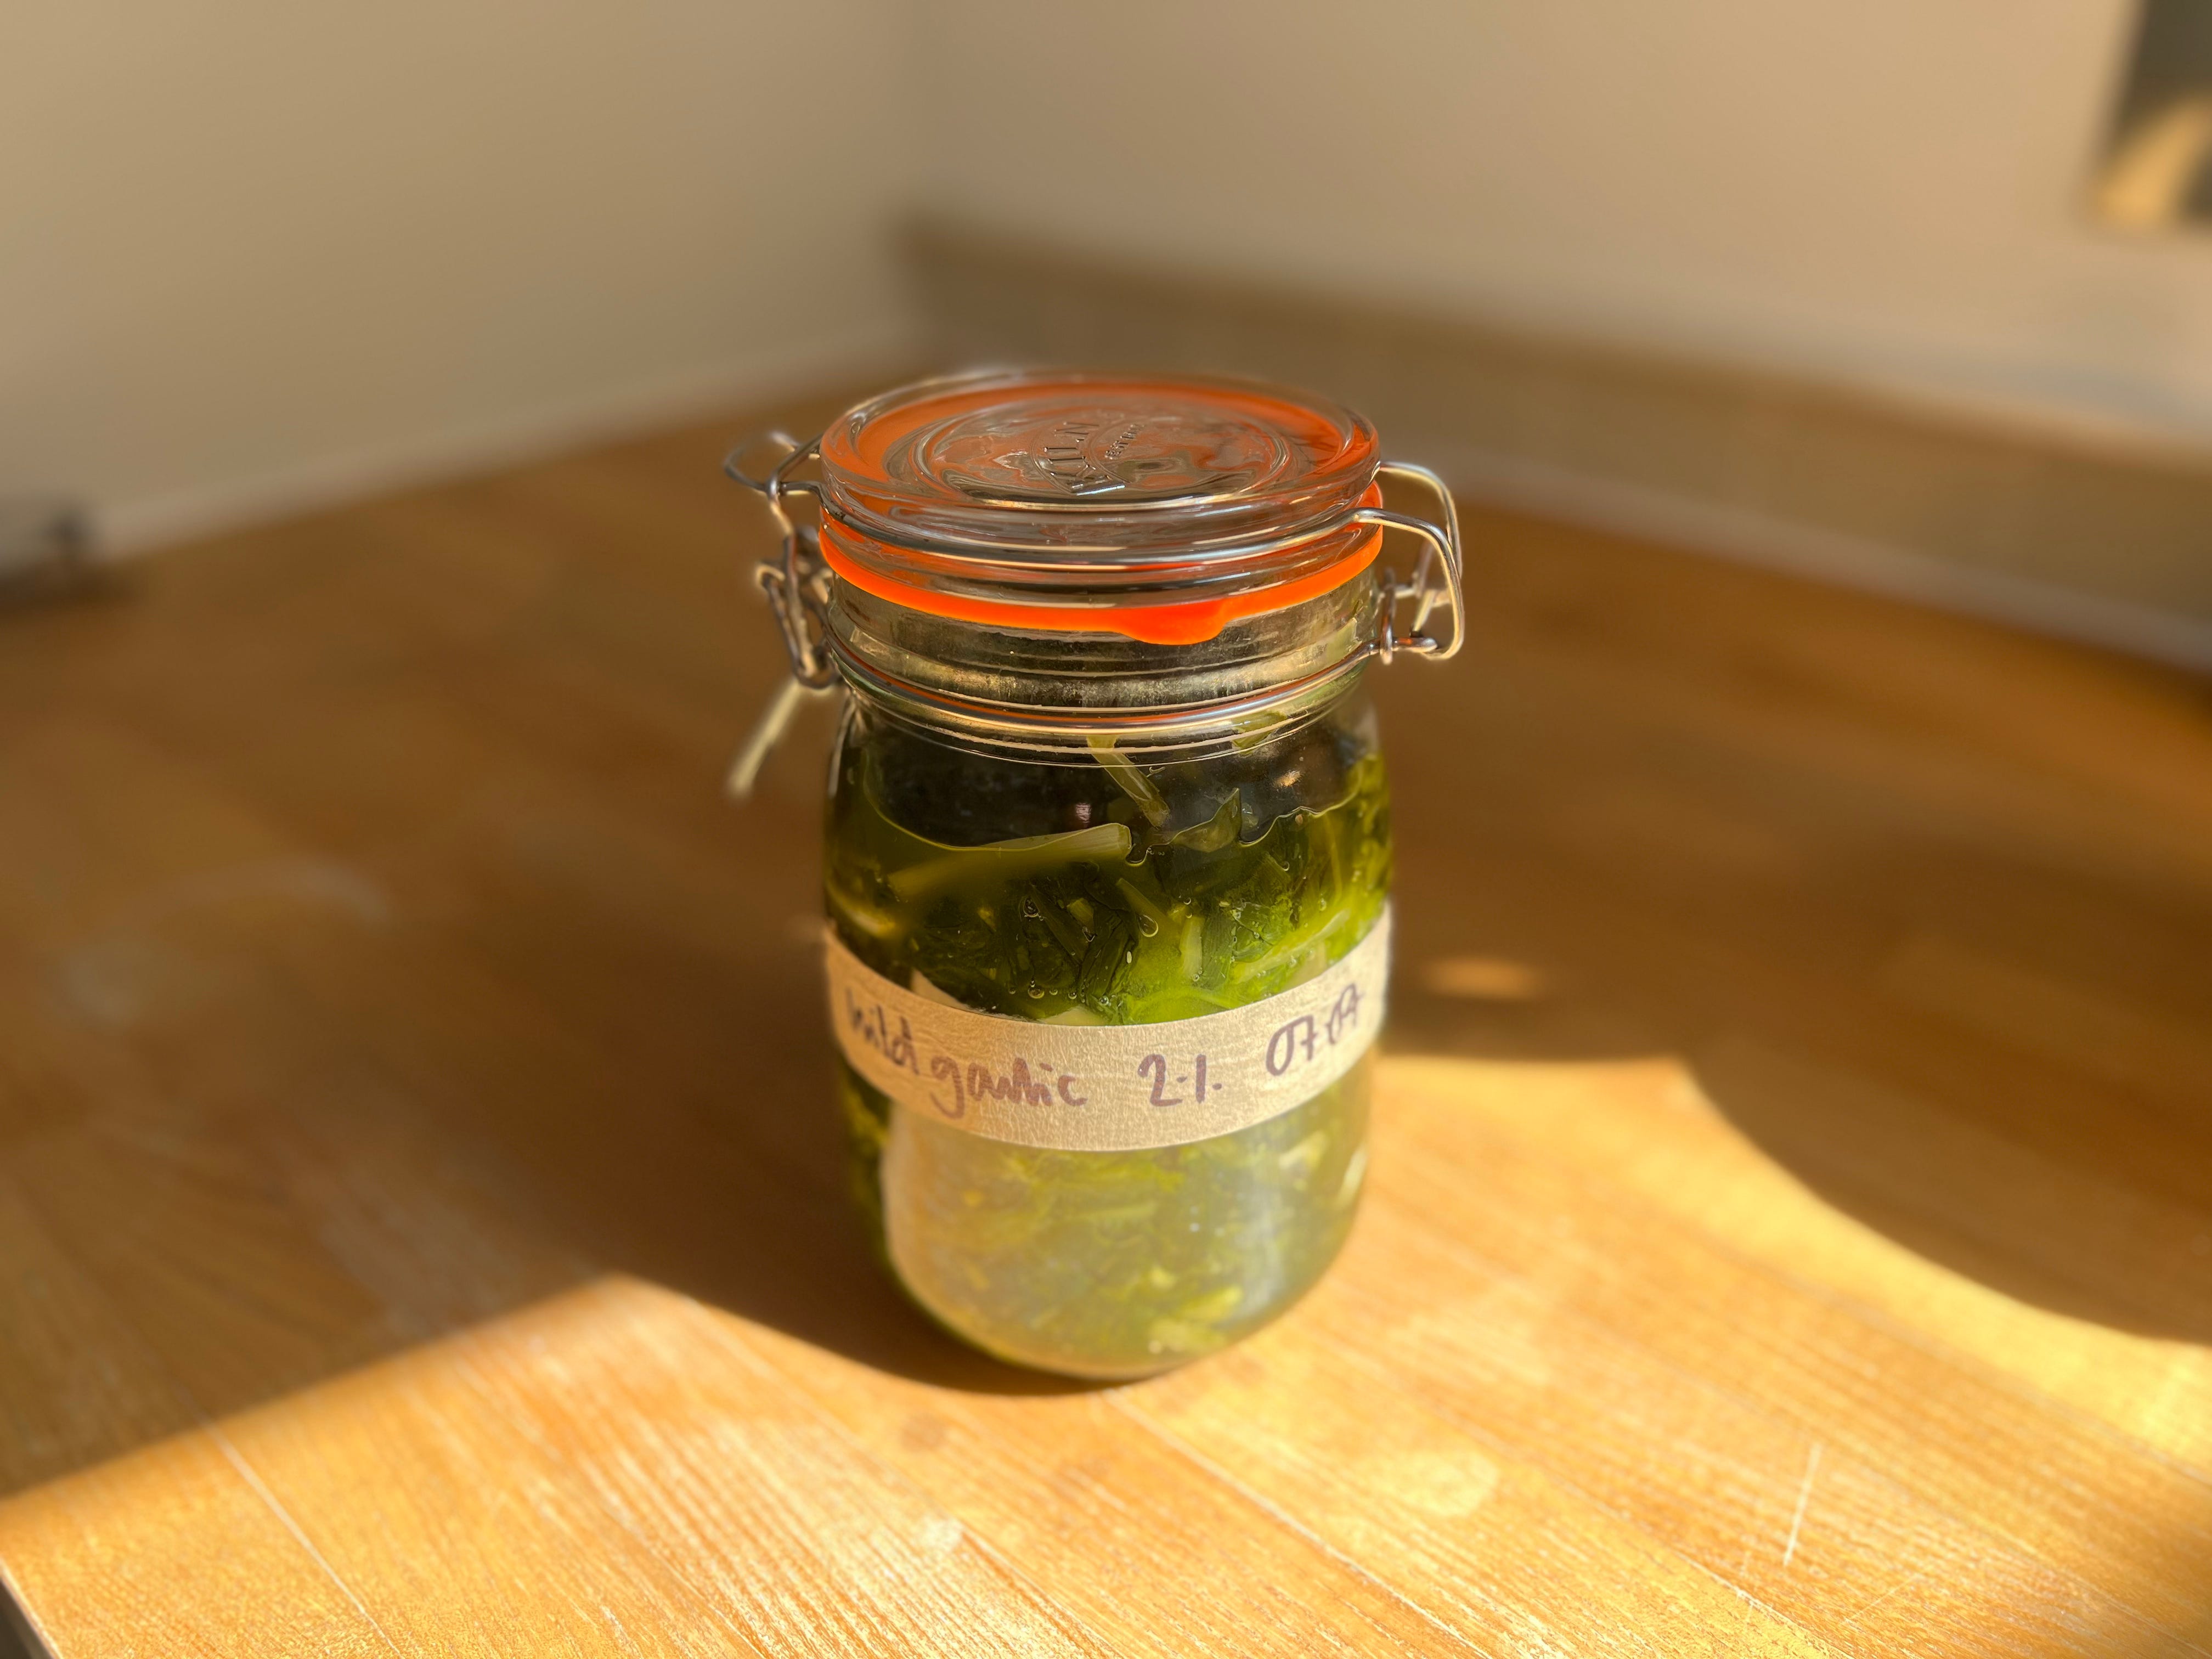
Fermented wild garlic
Makes 1 x 1 litre jar
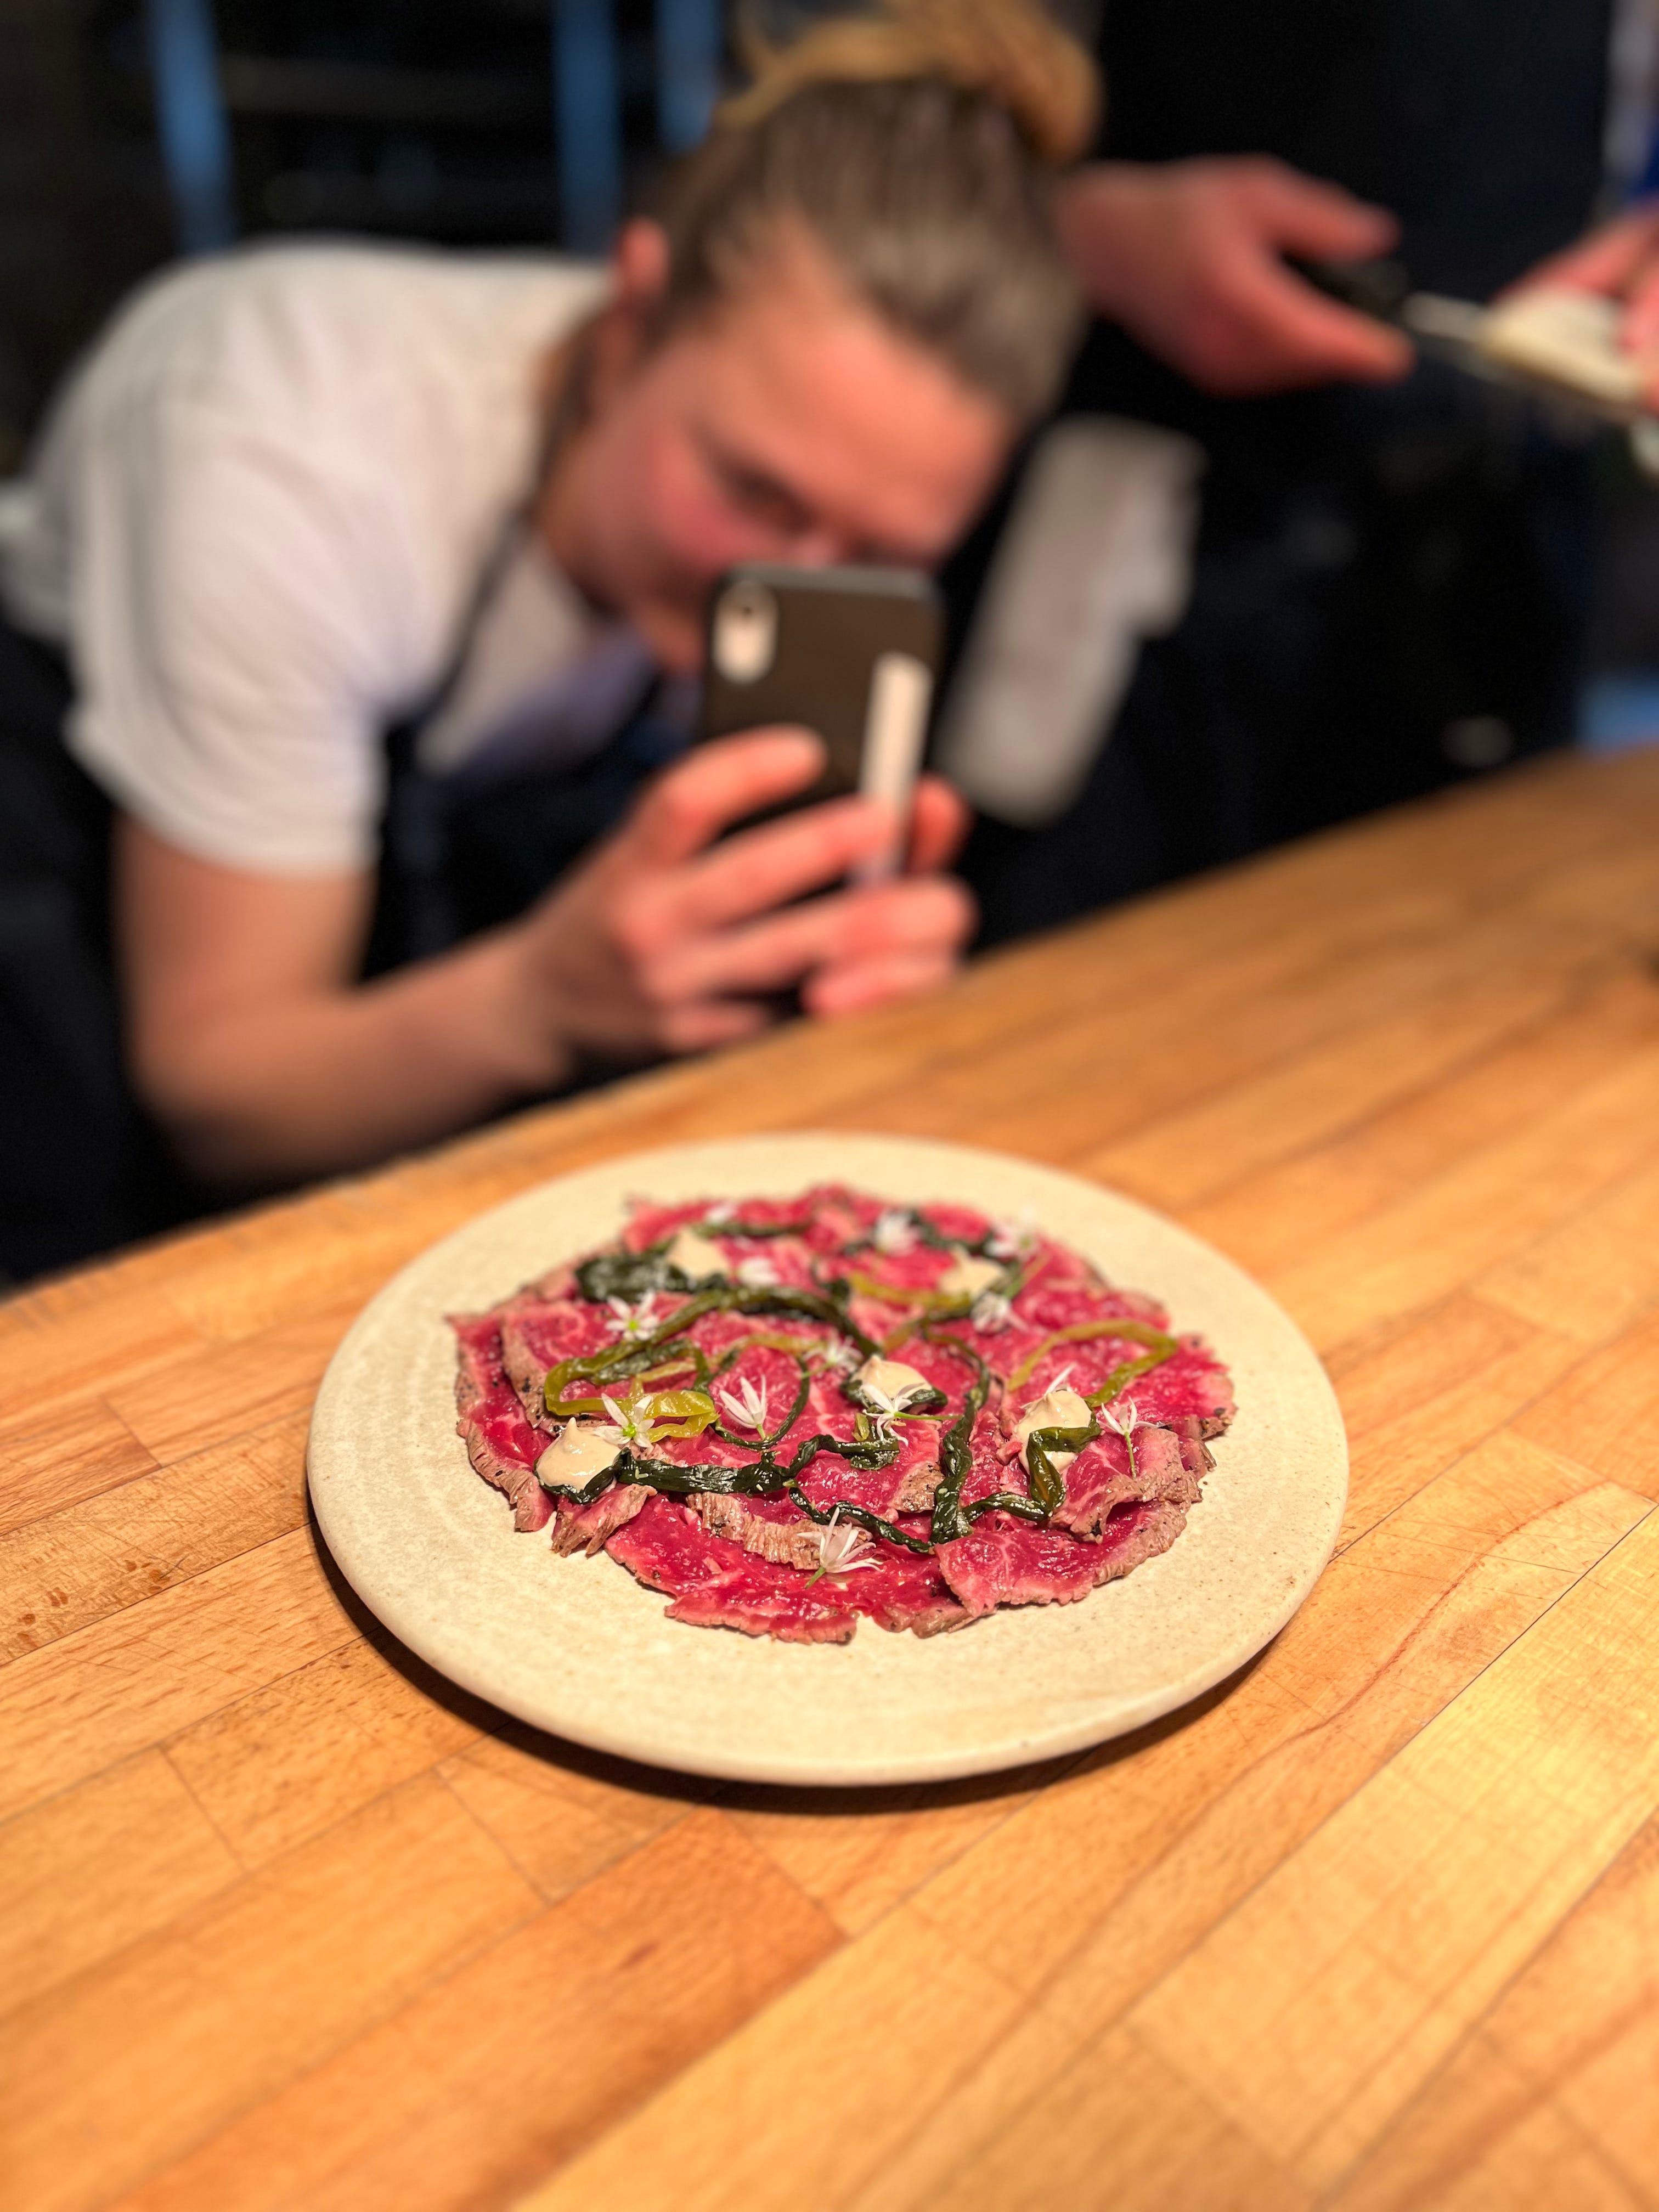
This recipe is truly my favourite thing to ferment. It is incredibly easy and relies on just two ingredients. It’s a wonderful way of using the slightly tougher, later season leaves of wild garlic (you can read my guide to what else to do with wild garlic here). that often get forgotten. When finished, the brightly acidic and pungent leaves are wonderful in countless applications. Try them chopped and added to the oozing centre of a toasted cheese sandwich, strewn over a beef carpaccio or fish crudo, or added to a hand-chopped salsa verde or chimichurri. It’s a ferment that’s wonderful eaten straight from the jar, too.
1kg wild garlic leaves
20g salt (fine or flaky sea salt - I always use Halen Mon)
It’s important to remember that this recipe can be applied to any quantity of wild garlic you have to hand - it’s unlikely you’ll return home with the exacting accuracy of leaves specified here. After harvesting and returning home, weigh your wild garlic. To calculate the 2% of salt that’s required, simply multiply the weight in grams by 0.02. For 1kg of wild garlic as above, for example use the sum 1000 x 0.02 = 20.
Wash the wild garlic in cold running water, removing any debris from the woodland as you do so. You may need to do this in batches. Pat dry or process in a salad spinner, then place in a large bowl. I must admit that I was without a bowl large enough and so used a large casserole pot instead.
Scatter over the salt and begin to scrunch it into the leaves. Continue scrunching, turning and folding the wild garlic with your hands for 5 minutes or so, until the wild garlic has significantly decreased in size and released a generous pool of emerald-green liquid. Set aside for 30 minutes while the salt continues to drawn out moisture from the leaves.
Add the salted wild garlic to a 1 or 1.5 litre sterilised jar (I usually opt for one like this), gradually pushing and pressing it down with your fist at each addition to remove any pockets of air. Continue until all the wild garlic is in the jar, then cover with the liquid remaining in the bowl. There should be enough to cover the wild garlic, and possibly a little too much (remove a few spoonfuls if so). It’s important here to leave at least a 3cm gap at the top of the jar, as when fermentation begins and carbon dioxide is produced, the contents grow a little in volume.
Cover with a small round piece of greaseproof paper that’s just larger than the opening of the jar, and add a sterilised weight. I really like using glass fermentation weights like these, and have done so for years. I just cover them in freshly boiled water before using each time to sterilise them. Alternatively you can use a clean sandwich bag full of water, or a very small jar that’s been sterilised and is full of something weighty like rice or dried pulses (ceramic baking beans work well).
Clasp the lid shut and place somewhere out of direct sunlight and at a warm ambient temperature (around 16-18c). After 3 or 4 days, begin ‘burping’ the jar by opening and closing it, allowing the carbon dioxide that has been produced to escape. Continue this process each day, noticing how many bubbles are produced each time. Begin tasting it, noting the flavour and levels of salt and acid. Continue fermenting until you achieve the balance you’re after, then store in the fridge.
What if your jar isn’t producing any bubbles?
This may mean that your ambient temperature is too cool, in which case leave to ferment for another few days before opening the jar again. Alternatively, the seal on the jar could be a little worn-out, in which case gas will be constantly escaping in small amounts, removing the expected ‘release’ of bubbles you’re expecting. In this instance it’s best to taste the wild garlic to gauge it’s readiness.
What if it tastes too salty?
Simply allow to ferment for another couple of days, then taste again.
What if mould develops on the surface?
If left at ambient temperature for a long time, especially if any of the fermented vegetable is exposed to air, it’s likely a little mould or yeast may develop on the surface. You can simply remove this all with a clean spoon, and all the remaining vegetable content that isn’t exposed to air will be totally fine to consume.
How do I ferment in brine, rather than dry salt?
If you want to keep vegetables whole, rather than cutting or grating them - like baby carrots - a 2% salt brine is a wonderful way to achieve a delicious ferment. Watch this space for a guide to salt brines, soon!
Further fermentation reading;
The Art of Fermentation, by Sandor Katz
The Noma Guide to Fermentation, by Rene Redzepi and David Zilber
Bar Tartine, by Nicolaus Balla and Courtney Burns
If you’re already subscribed, or perhaps have arrived here on the generous recommendation of a friend, you’re very welcome. Salt and the Earth is a newsletter with one simple aim - to share simple recipes, writing and podcasts that empower you to feel closer to the food you’re eating, every time you cook.
If you’ve enjoyed reading this entry at all then please consider sharing it - it would mean a great deal to know this had found even more hungry minds.
Hugo x